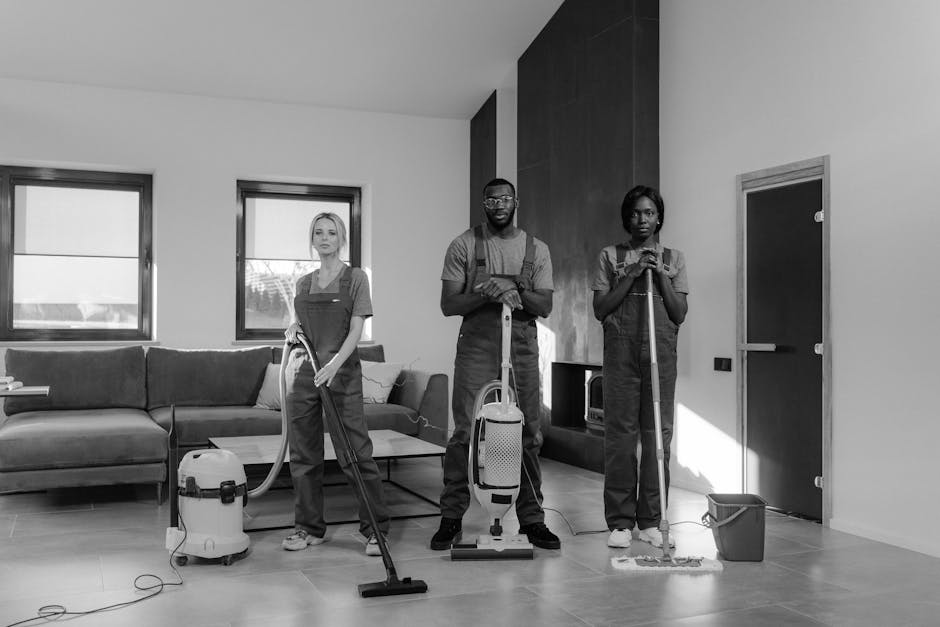
NW2 end of tenancy cleaning checklist landlords will trust

Moving out is stressful enough without second-guessing every skirting board, cupboard shelf, and bathroom sealant line. If you are trying to hand back a property in good shape, a proper NW2 end of tenancy cleaning checklist landlords will trust makes the difference between a smooth checkout and a messy dispute. It also saves time, which, let's face it, is usually in short supply at the end of a tenancy.
This guide is written for tenants, landlords, letting agents, and anyone who wants a practical, no-nonsense standard for the final clean. You will find a room-by-room approach, common pitfalls, realistic best practices, and a checklist you can actually use. If you want the kind of result a landlord is more likely to accept first time, start here.
- Why it matters
- How it works
- Key benefits
- Who needs this
- Step-by-step guidance
- Expert tips
- Common mistakes
- Tools and resources
- Law, compliance and best practice
- Options and comparison
- Real-world example
- Practical checklist
- Conclusion
- Frequently asked questions
Why NW2 end of tenancy cleaning checklist landlords will trust Matters
End of tenancy cleaning is not just about making a property look tidy. It is about returning it in a condition that matches the expectations set at the start of the tenancy, allowing for fair wear and tear. In NW2, where rental properties range from compact flats to family homes, expectations can vary quite a bit from one landlord to the next. A good checklist brings order to that uncertainty.
Landlords tend to trust a clean that is systematic, not rushed. That means the oven is not just wiped on the outside, the bathroom is not just scented, and the carpets are not just hoovered in visible areas. They notice the details. Sticky kitchen drawers, dust on wardrobe tops, limescale around taps, and window tracks filled with grit all suggest the clean was incomplete.
Truth be told, a lot of disputes happen because people clean based on what they can see in five minutes, rather than what a checkout inspection actually checks. A landlord or agent is often looking for consistency across the property, not a few shiny spots. That is where a structured cleaning checklist earns its keep.
If you are a landlord, the right checklist helps you judge whether a property is ready for re-letting without guesswork. If you are a tenant, it helps you protect your deposit and avoid the awkward "we need to deduct for cleaning" conversation. Nobody enjoys that one.
How NW2 end of tenancy cleaning checklist landlords will trust Works
The checklist works by breaking the property into clear zones and then checking each zone against the level of cleanliness a reasonable landlord would expect at check-out. The goal is not perfection for its own sake. It is completeness, consistency, and attention to the places people often forget.
A strong end of tenancy clean usually follows this pattern:
- Declutter and remove all personal belongings.
- Dust from top to bottom so dirt does not fall onto cleaned surfaces.
- Clean dry surfaces first, then move on to wet cleaning.
- Tackle kitchens and bathrooms carefully, since these rooms show neglect fast.
- Finish with floors, carpets, and final touch points like switches, handles, and skirting boards.
You will notice the order matters. Cleaning a bathroom floor before wiping the sink is just setting yourself up to do the job twice. Same with the kitchen. If you scrub the hob but leave greasy cabinet handles untouched, the room still feels unfinished. Small things, big impact.
Landlords generally trust checklists that include both visible and less visible areas. Under appliances, behind bins, inside drawers, around seals, and on top of doors all count. A proper checklist makes those details hard to miss.
Key Benefits and Practical Advantages
A good checklist is useful for more than one reason. It reduces stress, improves final inspection results, and helps everyone involved understand what "clean" actually means in practice.
- Better deposit protection: A complete clean lowers the risk of cleaning deductions.
- Faster checkout inspections: When surfaces, fixtures, and flooring are handled properly, there are fewer issues to argue over.
- Clearer expectations: Both tenant and landlord can follow the same standard.
- More efficient cleaning: A sequence reduces wasted effort and missed areas.
- Better presentation for re-letting: Clean properties tend to photograph and present better, which matters when time is tight between tenancies.
There is also a practical emotional benefit. Once the clean is under control, the move suddenly feels more manageable. Boxes still need shifting, paperwork still needs doing, but at least the place is no longer shouting at you from every corner.
For landlords, a reliable end of tenancy standard can also reduce the chance of repeated follow-up visits. Nobody wants to be chasing a cleaner for a second pass because a cooker hood or bathroom extractor fan was overlooked.
Who This Is For and When It Makes Sense
This checklist is for anyone who needs a tenancy handover to go smoothly. That includes tenants leaving a rented home, landlords preparing a property for new occupants, and letting agents checking whether the condition matches the inventory and checkout notes.
It makes the most sense when the property is:
- being vacated at the end of a fixed-term or rolling tenancy
- due for a checkout inspection
- being prepared for new tenants after repairs or decorating
- occupied by tenants who want to clean thoroughly before moving out
- managed by a landlord who prefers a detailed, room-based standard
In NW2, this often comes up in flats with compact kitchens, shared hallways, older windows, and hard-working bathrooms that gather limescale faster than anyone would like. If the property has pets, smokers, or lots of built-in storage, the clean needs even more attention. A quick wipe is rarely enough, to be fair.
If you are trying to decide whether to do it yourself or bring in help, use the checklist as your honest test. If the property is relatively small and lightly used, DIY may be manageable. If there are stains, heavy grease, limescale, or a tight move-out deadline, professional support may be the calmer choice.
Step-by-Step Guidance
Here is a practical room-by-room method that mirrors what landlords usually inspect. Think of it as a sensible route through the property rather than a random chore list.
1. Start with a proper walkthrough
Before you clean anything, walk through every room with a bag for rubbish, a notepad, and decent light. Open cupboards. Check behind doors. Look at windows in daylight if possible. The grime you miss at this stage will come back to haunt you later. A torch on a phone can be surprisingly useful here.
2. Remove rubbish and personal items
It sounds obvious, but leftovers in a fridge drawer, a sock under the bed, or old batteries in a kitchen drawer can make a property feel neglected. Landlords notice clutter. Ten minutes spent clearing out hidden odds and ends can change the whole impression of the place.
3. Clean the kitchen thoroughly
The kitchen is usually the room most likely to trigger comments at checkout. Focus on:
- inside and outside of cupboards
- worktops, splashbacks, and sink
- hob, extractor hood, and cooker exterior
- oven interior if included in the tenancy expectation
- fridge, freezer, and microwave
- kickboards, handles, and behind appliances where accessible
Grease and crumbs hide in awkward places. Under the oven and between cabinet edges is the kind of place people forget, then regret. If the kitchen smells stale, clean the bins, empty the fridge fully, and air the room afterwards.
4. Tackle the bathroom with detail
Bathrooms need more than a quick spray. Clean limescale from taps, shower screens, tiles, and around plugholes. Wipe extractor fans, light switches, and the top of the toilet cistern. Check sealant for mould staining and remove soap residue from trays, screens, and basin edges where you can safely do so.
Even a neat-looking bathroom can fail inspection if the glass is cloudy or the grout looks ignored. It is one of those rooms where small flaws stand out, especially under bright morning light.
5. Dust and wipe living spaces and bedrooms
In living rooms and bedrooms, work from top to bottom:
- remove cobwebs from corners and ceiling edges
- dust shelves, ledges, picture rails, and curtain tops
- wipe skirting boards and door frames
- clean inside wardrobes, drawers, and storage cupboards
- check under beds and furniture
- vacuum carpets and upholstered areas carefully
Windowsills and radiator tops are classic forgotten spots. So are light pull cords and switch plates. Not glamorous, I know, but they matter.
6. Handle floors properly
Floors should be cleaned according to their finish. Carpets may need deep vacuuming, spot treatment, or a more thorough carpet cleaning service if there are obvious marks or odours. Hard floors should be swept, vacuumed, and mopped with the right product for the material.
If there is pet hair, be patient. It gathers in corners, under radiators, and along skirting edges like it owns the place. A standard vacuum is sometimes not enough on its own.
7. Finish with windows, fixtures, and touch points
Landlords often notice what hands touch most: handles, switches, banisters, and remotes if they remain with the property. Wipe these down. Clean window glass, frames, and sills where accessible. If the property has blinds, check for dust buildup. The final result should feel fresh, not just tidy.
One quick note: if you are using cleaning products on a delicate surface, test carefully first. A shiny surface can turn into a dull patch very quickly if the wrong product is used. Nobody needs that surprise five minutes before checkout.
Expert Tips for Better Results
Here is where a good clean becomes a landlord-trusted clean. Small details, handled consistently, make the whole job look more professional.
- Use a top-to-bottom sequence. Dust falls. Gravity is annoyingly reliable.
- Work room by room. Jumping between rooms usually leaves gaps.
- Let products sit briefly where safe. Degreasers and bathroom cleaners often work better with a short dwell time.
- Check natural daylight. Evening light can hide streaks on glass and marks on paintwork.
- Photograph the result. Useful for your own records, especially if you are a tenant.
- Replace the little things. Empty bins, new toilet roll, clean plugholes, and dry sinks all help the property feel properly finished.
In our experience, the strongest checkout cleans are never flashy. They are careful, repetitive in the right way, and a bit boring in the best possible sense. If the kitchen extractor is clean, the bathroom smells fresh, and the skirting boards are not carrying a dust fringe, you are already ahead.
If you have a pet, pay extra attention to soft furnishings. For stubborn smells or hair, a specialised treatment like pet stain and odour removal may be worth considering, especially where carpets or sofas have absorbed the problem over time.
Common Mistakes to Avoid
Most end of tenancy disputes come from a handful of avoidable mistakes. The tricky part is that they often look minor while you are doing them and obvious later.
- Only cleaning visible surfaces. Cupboard tops, appliance edges, and behind toilets still count.
- Leaving the oven or hob half-done. Grease is difficult to hide.
- Ignoring windows and seals. Smudges and mould staining can make a clean look unfinished.
- Not matching the inventory condition. The tenancy paperwork matters more than people expect.
- Using the wrong product. Harsh chemicals can damage paintwork, worktops, or flooring.
- Running out of time. Rushing the final hour usually creates more problems than it solves.
Another common one: cleaning around furniture and forgetting to move it. That neat patch on the carpet can actually work against you if the rest of the room shows the original dust line. Landlords and agents see that sort of thing quickly.
A slightly messy but thorough clean is better than a shiny surface clean with hidden dirt everywhere. That sounds obvious, yet it gets missed all the time.
Tools, Resources and Recommendations
You do not need a van full of specialist kit to do a decent job, but a few good tools make everything easier. A sensible setup usually includes:
- a reliable vacuum cleaner with attachments
- microfibre cloths
- a bucket and mop for hard floors
- a gentle all-purpose cleaner
- a degreaser for kitchen surfaces
- a bathroom cleaner for limescale and soap residue
- gloves, sponges, and non-scratch pads
- bin bags, dust sheets, and a torch
For soft furnishings, there are specialist services that can help where stains or odours have soaked in. If you need support beyond the usual clean, pages such as sofa cleaning, upholstery cleaning, and curtain cleaning may be relevant when the tenancy includes those items or when they have clearly seen better days.
For mattresses, especially in furnished lets, mattress cleaning can be worth a look if there are visible marks or lingering smells. If rugs are part of the property, rug cleaning is another practical option.
And if you are comparing whether to tackle the clean yourself or bring in a professional, a clear quote matters. You can review pricing and quotes before deciding. Straightforward information usually saves a lot of back-and-forth.
Law, Compliance, Standards, or Best Practice
End of tenancy cleaning sits within wider UK rental practice rather than one single cleaning law. That means the main reference point is usually the tenancy agreement, the inventory, and the general expectation that the property is returned in a reasonably clean condition, allowing for fair wear and tear. Exact disputes can vary, so careful wording and documentation matter.
For landlords and letting agents, best practice is to be clear about expectations from the start. If an oven must be professionally cleaned, or carpets are expected to be treated before handover, that should be stated somewhere sensible in the tenancy documents or inventory notes. If it was not communicated early, arguments at the end are far more likely. Nobody really wins those.
Good practice also includes safe working habits. For example, use products according to the instructions, ventilate rooms when needed, and avoid mixing chemicals. If a property contains delicate flooring, older fixtures, or specialist surfaces, the cleaning method should match the material rather than forcing one universal approach.
If a professional cleaner is involved, it is reasonable to look for clear service terms, payment clarity, and safety awareness. Internal policy pages such as insurance and safety, health and safety policy, and terms and conditions are useful reference points for understanding how a company works. For peace of mind around payments, payment and security can also help set expectations.
If sustainability matters to you, especially in shared homes or family lets, you may also want to look at a company's recycling and sustainability approach. That is not the deciding factor for everyone, but it is a nice bonus when the basics are already handled well.
Options, Methods, or Comparison Table
Different situations call for different approaches. Sometimes DIY is enough. Sometimes a targeted professional clean is the smarter route. Here is a simple comparison to help you decide.
| Approach | Best for | Strengths | Possible downside |
|---|---|---|---|
| DIY end of tenancy clean | Light use, smaller properties, flexible timelines | Lower cost, full control, easy to stage over a few days | Easy to miss detail areas or underestimate time |
| Targeted specialist cleaning | Problem areas like carpets, sofas, ovens, or curtains | Focused results where it matters most | May still need general cleaning around it |
| Full professional end of tenancy clean | Tight move-out deadlines, furnished lets, heavy use | Consistent finish, less stress, more complete coverage | Higher upfront cost than DIY |
If the property has heavy traffic, pets, or deep-set stains, a combination approach is often the best value. For example, a tenant might do the general clean and book a specialist for carpets or upholstery. That tends to make practical sense, especially when time is tight and the checkout is looming on a Friday afternoon.
For more stubborn marks on floors or worktops, it may also help to think about specialist stain treatment rather than a general clean. A dedicated stain removal approach can sometimes make the difference between "acceptable" and "needs attention".
Case Study or Real-World Example
A typical NW2 example goes like this. A tenant leaves a two-bedroom flat after three years. The property is tidy at first glance, but the checkout checklist reveals a greasy extractor hood, limescale around the taps, dust behind the bedroom doors, and light carpet staining in the sitting room. Nothing dramatic. Just enough.
The tenant spends one evening doing a broad clean and misses the hidden bits. A landlord or agent would likely still flag the kitchen and carpets. The cleaner-looking surfaces create a false sense of completion, which is exactly where problems start. The next day, the tenant returns with a proper checklist: inside cupboards, skirting boards, windowsills, bathroom seals, light switches, and the space under the sofa. A carpet clean is arranged for the main room, and the kitchen is rechecked with daylight coming through the window.
At checkout, the property is accepted with only minor comments. Not because it was perfect. Because it was thorough, and the effort was obvious. That matters more than people think. Landlords can usually tell when a property has been treated with care.
Expert summary: A landlord-trusted end of tenancy clean is not about making the home look like a showroom. It is about proving that every ordinary part of the property was cleaned properly, from the obvious places to the awkward corners that are easy to ignore.
Practical Checklist
Use this checklist as a final pass before inspection. If you are a tenant, it can help you avoid the classic "we forgot that room" moment. If you are a landlord, it is a fair yardstick for readiness.
- Hallway and entrances: sweep, vacuum, wipe skirting boards, remove marks from doors, clean handles.
- Living room: dust shelves, skirting, sockets, light switches, and window sills; vacuum under furniture; clean glass.
- Bedrooms: empty wardrobes and drawers; dust rails and tops; clean mirrors and frames; vacuum thoroughly.
- Kitchen: clean cupboards inside and out; wipe worktops; clean sink and taps; degrease hob and extractor; check fridge and freezer; clean behind and under appliances where possible.
- Bathroom: clean toilet, basin, bath, shower, tiles, mirrors, taps, and seals; remove limescale; wipe extractor fan cover.
- Floors: vacuum carpets, mop hard floors, treat stains, check edges and corners.
- Windows and frames: clean glass, sills, and frames; wipe accessible tracks.
- Soft furnishings: vacuum sofas, cushions, curtains, and rugs if included.
- Final checks: empty bins, replace any removed items, take photos, and do one last smell test after airing the rooms.
A simple rule helps here: if you can touch it, a landlord might notice it. If you can see it in daylight, they definitely will.
And yes, check under the bed. It is always under the bed.
Conclusion
A trustworthy end of tenancy clean is really a mix of structure, detail, and common sense. The best NW2 landlords are not looking for theatre; they are looking for evidence that the property was left with care. A well-made checklist turns a stressful move-out into a controlled process, which is exactly what you want when time, energy, and patience are all running low.
Whether you clean the property yourself or bring in help for the stubborn bits, the key is to stay methodical. Focus on the hidden areas, the high-touch points, and the rooms that collect the most wear. That approach protects the condition of the property and makes the handover feel far less fraught.
If you are preparing for a checkout in NW2, take it step by step, keep your standards steady, and do not leave the final pass to luck. A calm, thorough clean has a way of smoothing everything else out. Small effort, big relief.
Get a free quote today and see how much you can save.
And if you are standing in an empty room at the end of a long moving day, looking at the last patch of dust on the skirting board, take a breath. You are nearly there.
Frequently Asked Questions
What should be included in an NW2 end of tenancy cleaning checklist?
A solid checklist should cover every room, plus hidden and high-touch areas. That includes kitchens, bathrooms, floors, cupboards, skirting boards, windows, switches, handles, appliances, and any soft furnishings included in the tenancy. The more systematic it is, the more likely a landlord is to trust the result.
Do landlords expect professional end of tenancy cleaning?
Not always. What landlords usually expect is a property returned in a clean and tidy condition, in line with the tenancy agreement and inventory. In some cases, especially with heavy wear or furnished properties, professional cleaning may be the easiest way to meet that standard.
How clean does the property need to be at the end of the tenancy?
It should be clean enough to match the agreed condition, allowing for fair wear and tear. In plain English, that means no grime, grease, strong odours, or obvious missed areas. A landlord should be able to inspect the home without finding avoidable dirt in routine places.
What are the most commonly missed areas?
Cupboard tops, behind appliances, skirting boards, window tracks, extractor fans, bathroom seals, light switches, and under beds are common misses. These are the places that often make the difference between a decent clean and one that passes inspection smoothly.
How far in advance should I start cleaning before moving out?
As early as you reasonably can. A few days gives you time to deep clean properly, deal with stains, and fix any small problems. Leaving everything to the final evening usually creates avoidable stress, and that never ends well.
Is oven cleaning usually part of end of tenancy cleaning?
Very often, yes. Ovens tend to be one of the first things checked because grease and burnt residue are obvious. If the tenancy agreement or inventory expects it to be cleaned, make sure you handle both the inside and outside thoroughly.
What if there are stains on carpets or sofas?
That depends on the stain, the material, and how long it has been there. Some marks respond well to standard cleaning, while others need specialist treatment. If the stain is visible or there is an odour issue, a targeted service can be a sensible option.
Can I clean the property myself and still meet landlord expectations?
Yes, if you are thorough and honest about the condition. DIY cleaning can work well for smaller or lightly used properties. The key is not to cut corners on the areas landlords check most closely, such as kitchens, bathrooms, and flooring.
What is the difference between end of tenancy cleaning and regular house cleaning?
Regular cleaning keeps a home tidy week to week. End of tenancy cleaning is deeper and more detailed. It usually includes inside cupboards, appliances, hidden dust, limescale, and other areas that routine cleaning often skips.
How can I avoid deposit deductions for cleaning?
Use the inventory as your guide, clean every room carefully, document the condition with photos, and leave the property free of rubbish and obvious dirt. If anything is damaged, report it separately rather than hoping no one notices. That honesty often helps more than people expect.
What should landlords look for in a cleaning service?
Clarity, reliability, and consistency. Good communication, clear pricing, sensible safety practices, and a detailed scope of work all matter. It also helps when the company is transparent about how it handles terms, security, and complaints if something goes wrong.
Is it worth getting carpets professionally cleaned before checkout?
If the carpets are heavily used, stained, or carrying pet hair or odours, yes, it can be worth it. A well-cleaned carpet improves the overall feel of the property and can make the checkout process easier. If the carpets are already in good condition, a thorough vacuum and spot treatment may be enough.
What is the simplest way to tell if the property is ready?
Do one final walkthrough in good light and ask yourself a blunt question: would you accept this if you were the landlord? If the answer is yes without hesitation, you are probably in good shape. If you start noticing smudges, smells, or missed corners, keep going a bit longer.